The #1 Aalto Retailer in the US. Learn more

The Largest Selection of Aalto Furniture in the US! Shop Aalto Furniture

Artek Webbing Guide

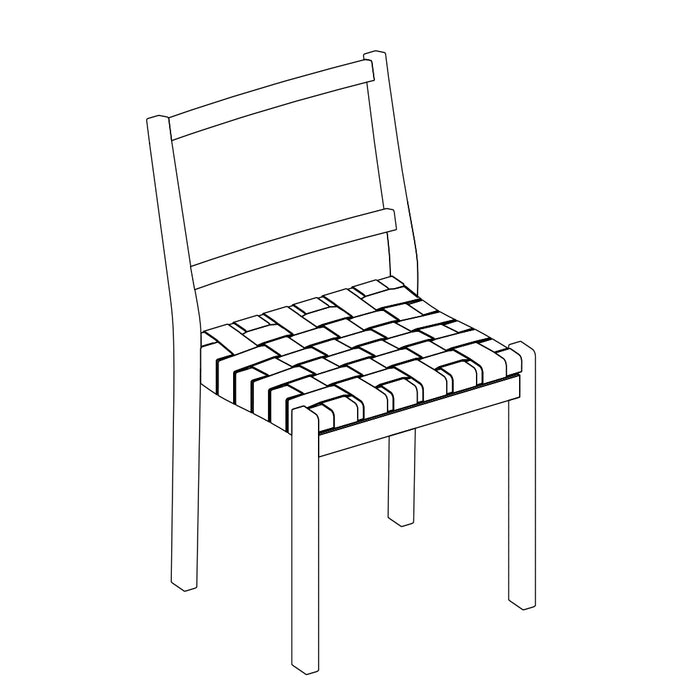
Early on in his career Alvar Aalto adopted webbing belts as alternative to classic upholstery. Ever since, webbing - a natural material made of 100% linen with a low consumption of resources - has been an elegant way to cover furniture with a slim silhouette.

After several years of use, the webbing may lose its tension upon which it needs to be replaced. Since Artek’s furniture is designed with longevity in mind, the webbing can easily be renewed, ensuring that the product goes through several life cycles.

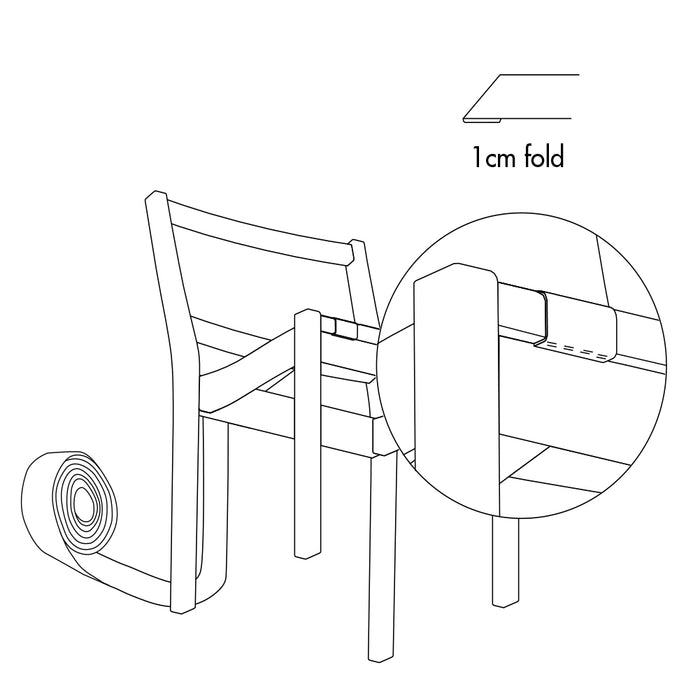
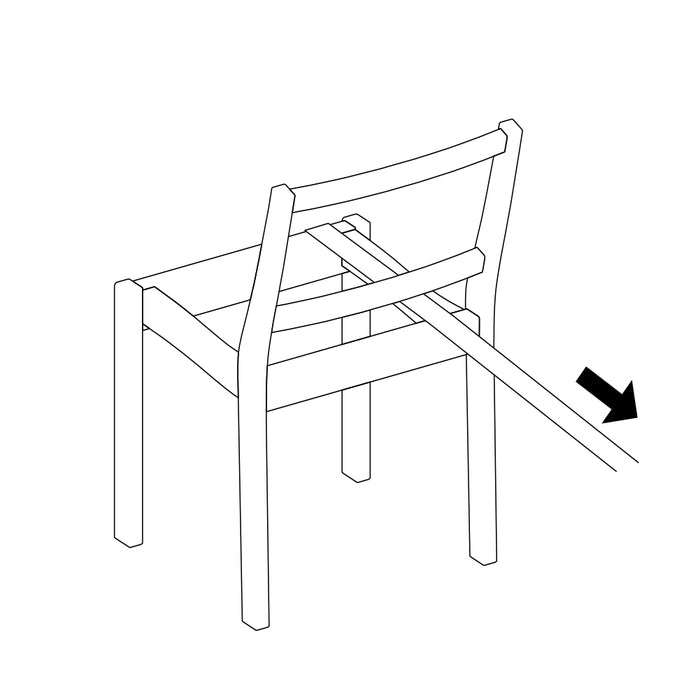
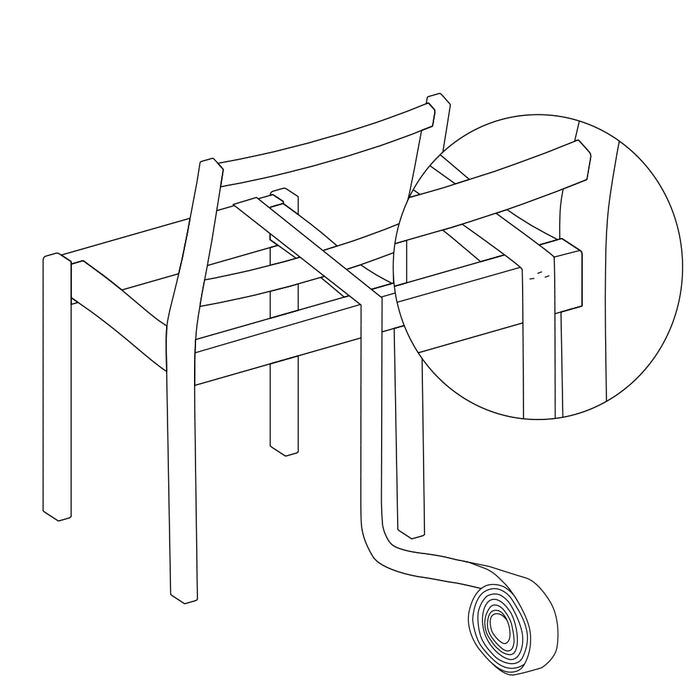
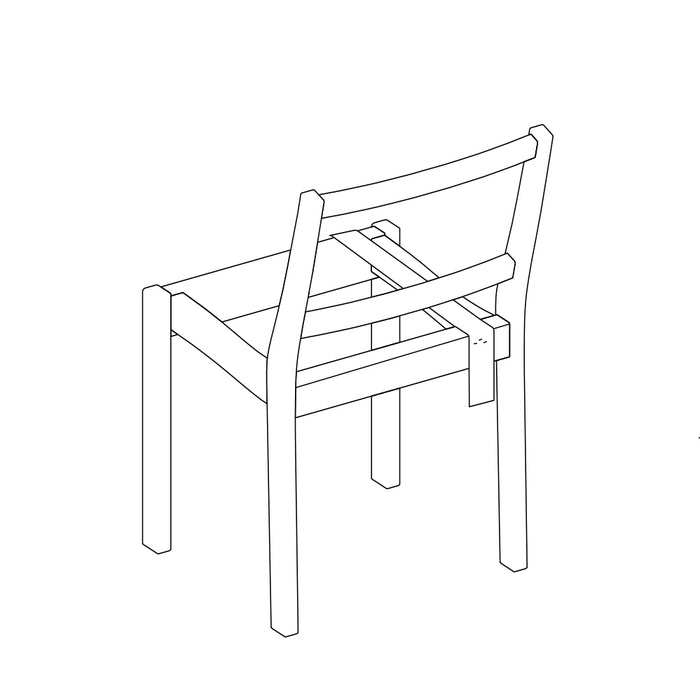
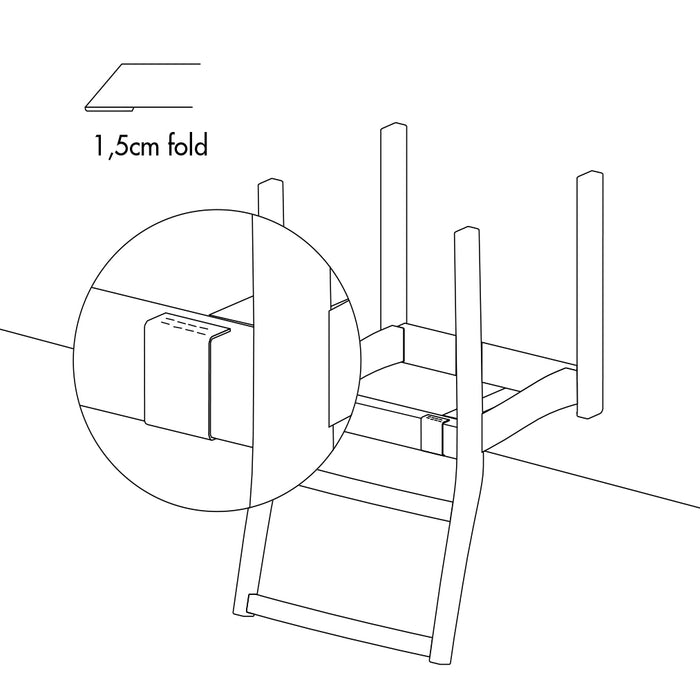
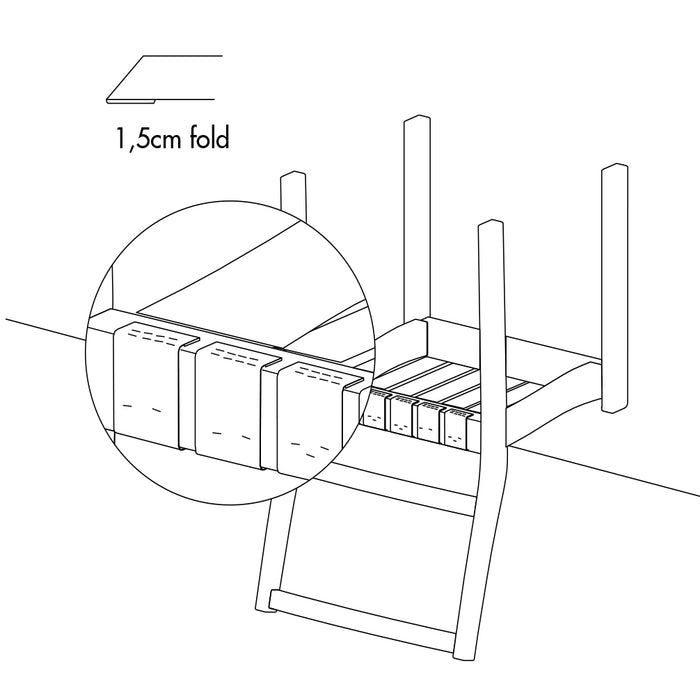
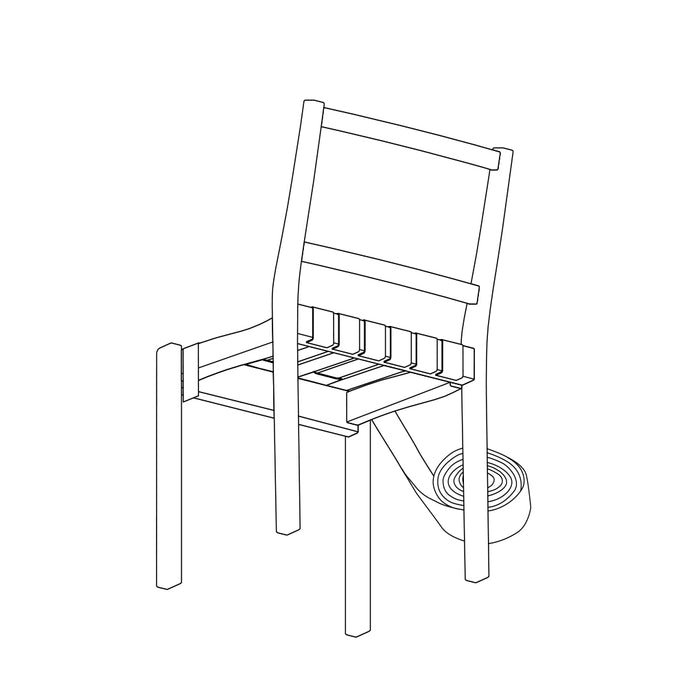
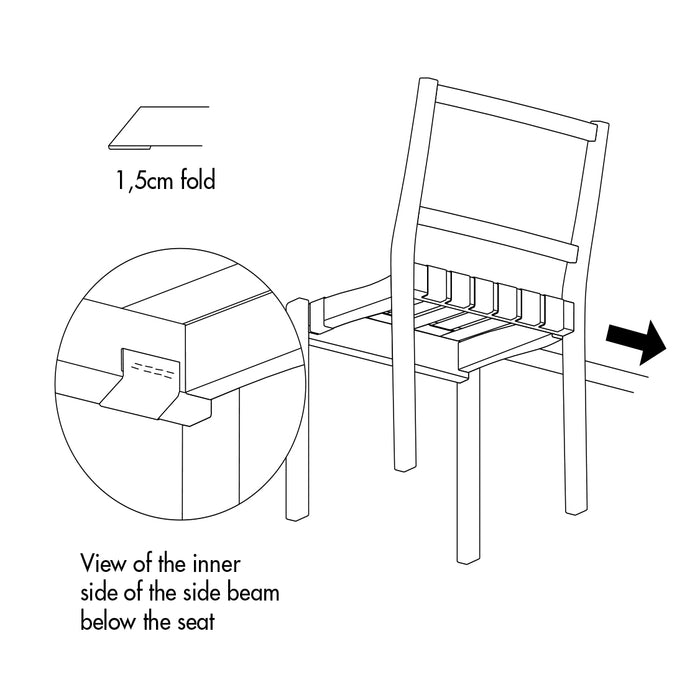
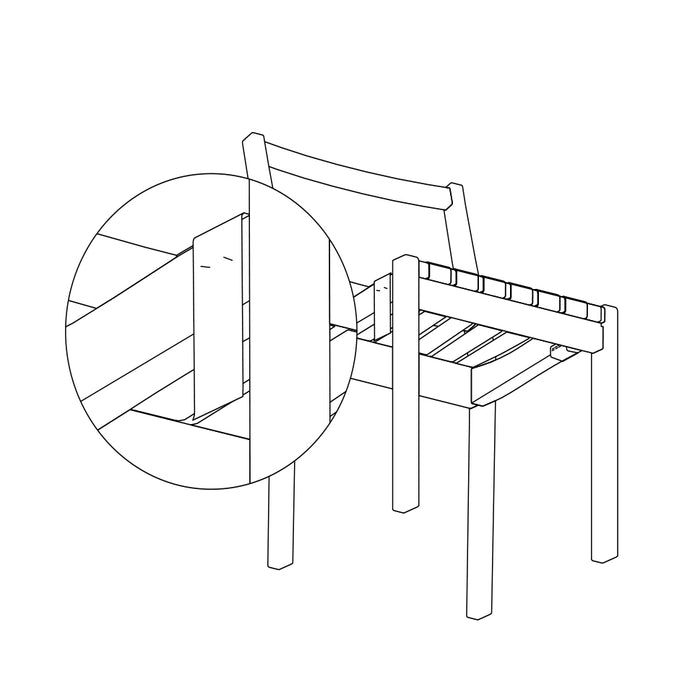
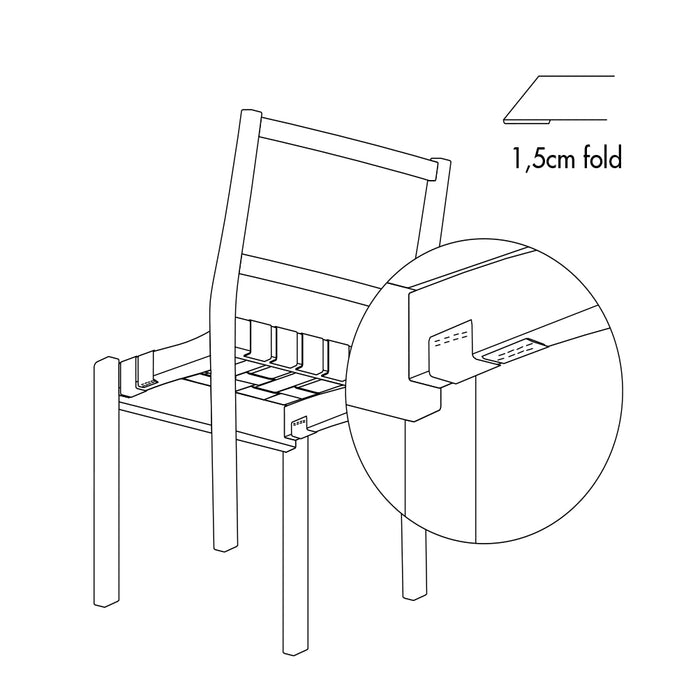
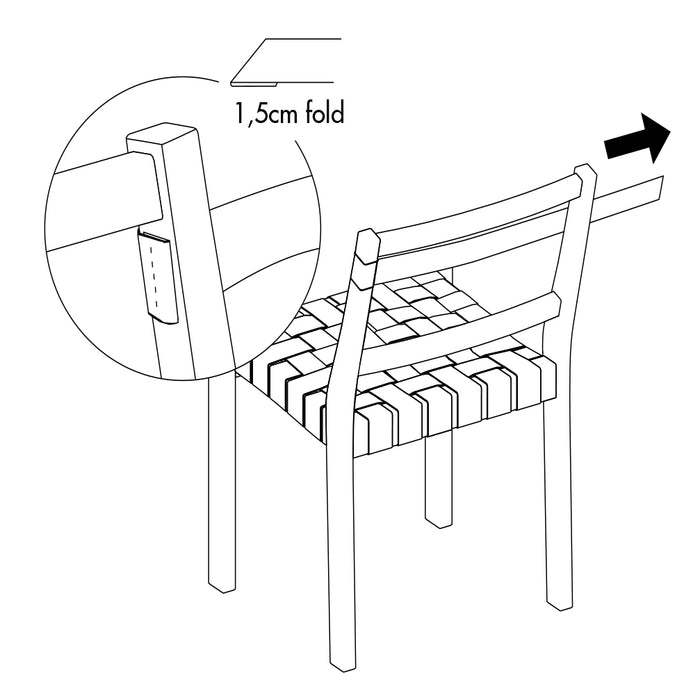
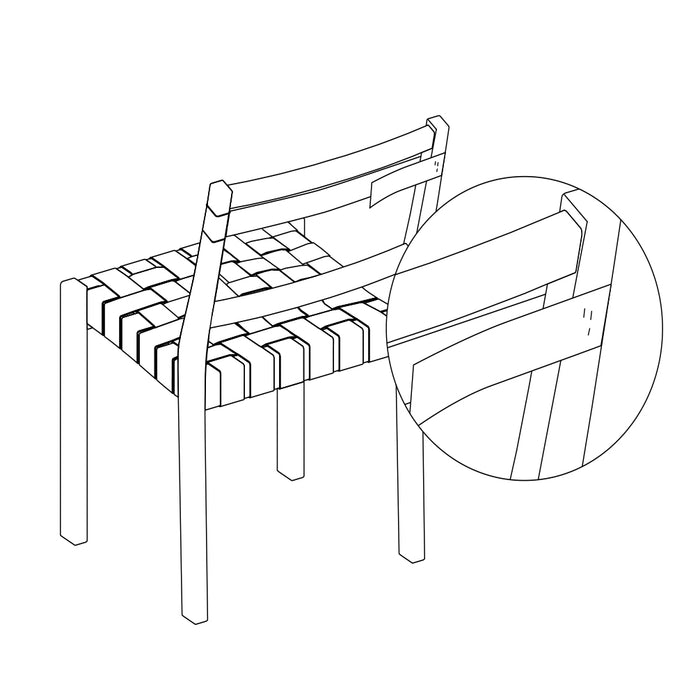
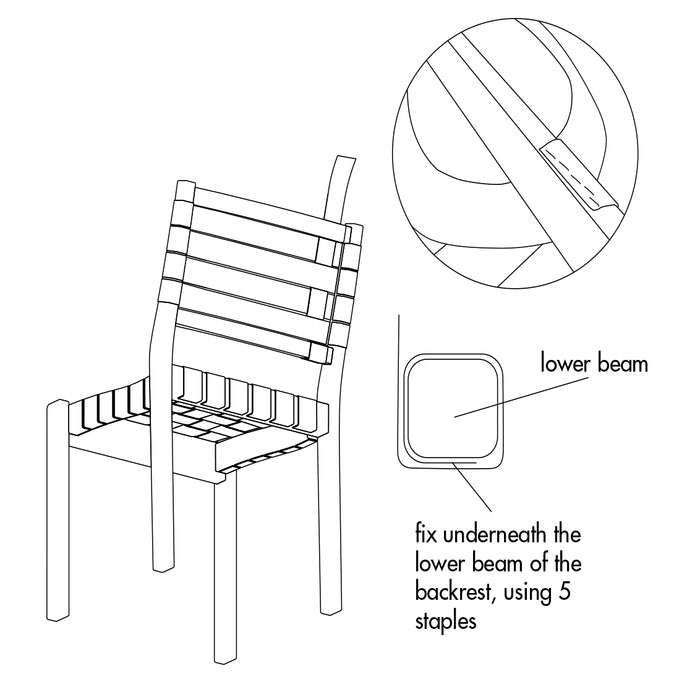
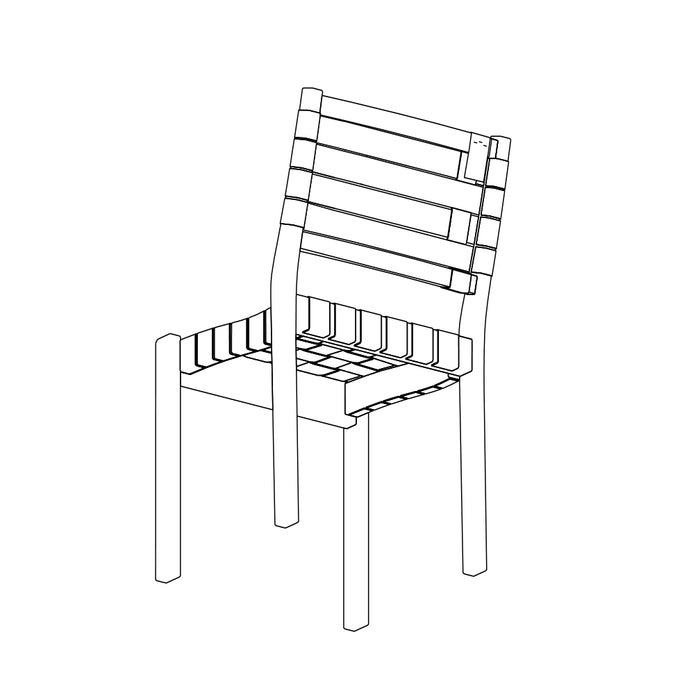
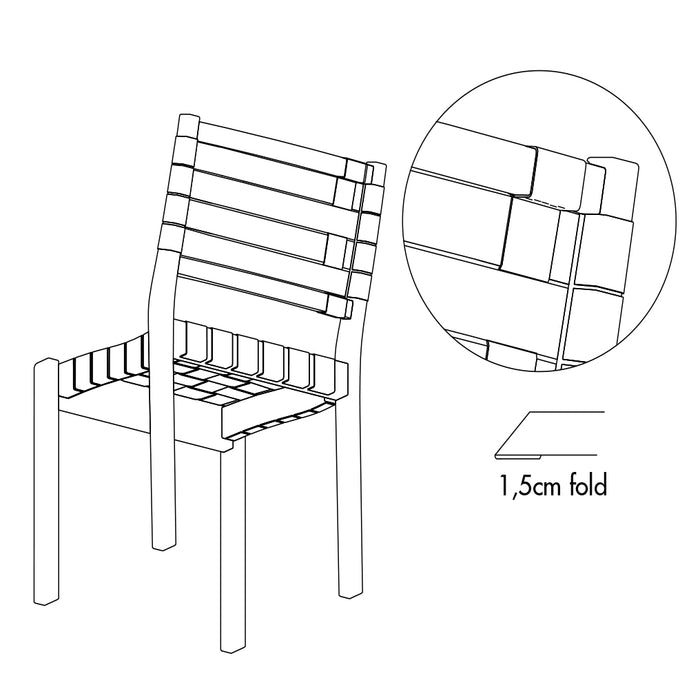
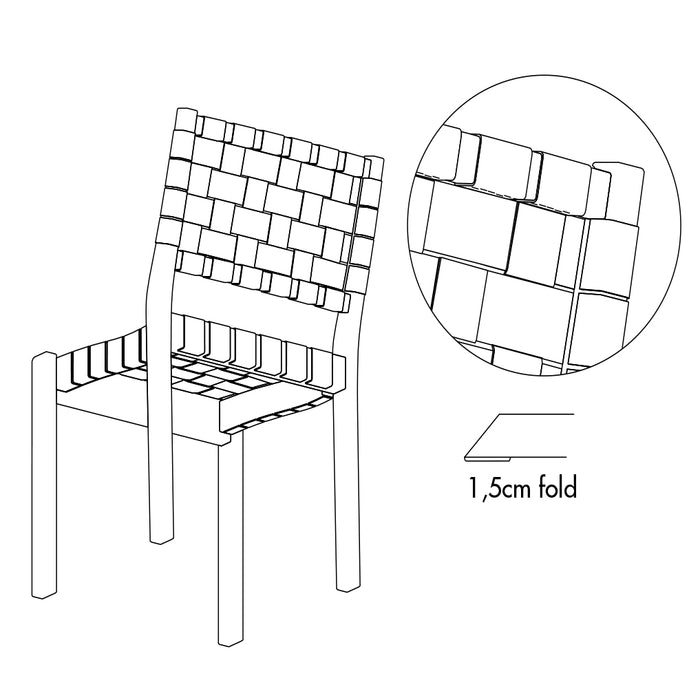
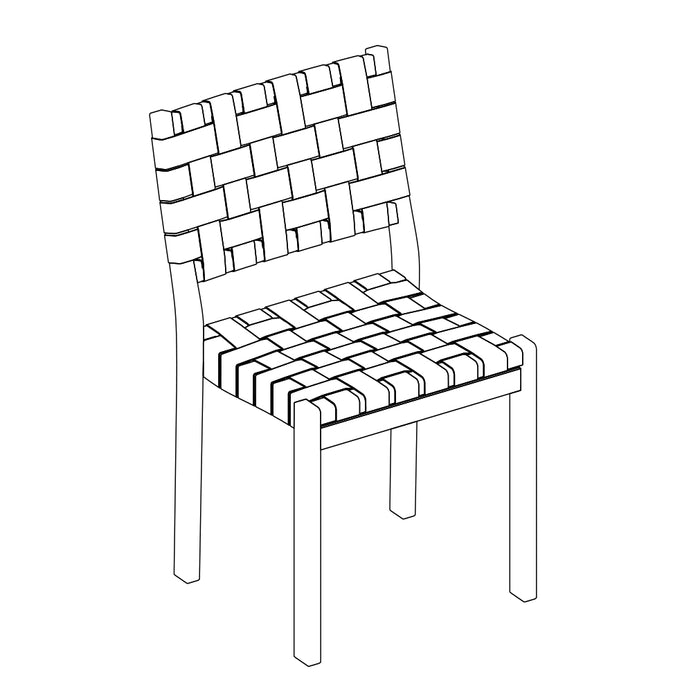
This guide lists all specifications needed for re-webbing, as well as a step-by-step instruction for professional upholsterers to re-web Alvar Aalto’s Chair 611.

Material Information

  • 100% natural linen, woven in Germany with Italian yarn
  • No chemical treatment / no anti-stain treatment
  • Available in a new quality since November 2018,
    developed for optimized stretch behavior and
    longer lasting upholstery through the use of extra
    twisted yarn and an additional pre-stretching step.

Choosing the Color

  • There are six standard colors of linen webbing available.
  • The linen webbing belts are made available in rolls of 50 meters, enabling local upholstery workshops to re-web products.

Defining the Required Amount

The chart shows the quantities needed for re-webbing (meters):

*This product is no longer in production

Important Notes:

The use of common 10mm (or 3/8”) staples made from stainless steel is recommended.

When removing the old webbing from a chair, make sure to take a photo of the whole chair and the areas where belts are attached to the wood. The photo as well as the bleached imprints of the wood will give you an indication of where to position the new belts.

Step by step re-webbing guide for Chair 611 (for professionals) – Seat

  • 1

    Fold one end of the webbing belt by 1 cm and fix it underneath the upper front beam of the seat, using 8 staples.

  • 2

    Tighten the loose end of the belt over the back beam of the seat with a tensioning tool.

  • 3

    Fix it temporarily to the beam’s
    backside with a couple of staples.

  • 4

    Cut the belt with 10 cm running
    from the upper edge of the back
    beam.

  • 5

    Fold the end of the webbing belt by ca. 1.5 cm and fix it underneath the back beam of the seat, using 8 staples. Remove the temporary staples and smoothen the fibers over.

  • 6

    Repeat this process with the
    remaining 5 belts that run in
    the same direction.

  • 7

    Note that for the webbing in this direction, the process for the first belt is slightly different than for the remaining 5, since they are fixed to a different surface than the first belt. For the first belt, web its loose end perpendicular to the already installed ones.

  • 8

    Fold it by 1.5 cm and fix it onto the inner side of the side beam below the seat, using 8 staples. Tighten the loose end of the belt over the side beam of the seat with a tensioning tool.

  • 9

    Fix it temporarily to the beam’s outer side with a couple of staples. Cut the belt with 13 cm running from the upper edge of the side beam.

  • 10

    Fold the end of the webbing belt by ca. 1.5 cm and fix it onto the inner side of the side beam below the seat, using 8 staples. Remove the temporary staples
    and smoothen the fibers over.

  • 11

    For the remaining five belts running in the same direction, web the loose end of the belt perpendicular to the already
    installed ones. Fold its end by 1.5 cm and fix it onto the bottom side (opposed to the inner side) of the side beam, using 8 staples.

  • 12

    Tighten the loose end of the belt over the side beam of the seat with a tensioning tool and fix it temporarily to the beam’s outer side with a couple of staples. Cut the belt with 10 cm running from the upper edge of the side beam.

  • 13

    Fold the end of the webbing belt
    by ca. 1.5 cm. Fix it onto the bottom side of the side beam, using 8 staples. Remove the temporary staples and smoothen the fibers over.

  • 14

    Repeat this process with
    the remaining 4 belts that
    run in the same direction.
    The seat is now finished.

Step by step re-webbing guide for Chair 611 (for professionals) – Backrest

  • 1

    For the horizontal belts of the
    backrest, fold the loose end of the webbing belt by 1.5 cm. Fix it onto the upper inner side of the backrest’s side beam, using 5 staples. Tighten the loose end of the belt over the other side
    beam with a tensioning tool.

  • 2

    Fix it temporarily to the beam’s
    backside with a couple of staples. Cut the belt with 7 cm running from the outer edge of the back beam (please check
    that this leaves you with sufficient material for stapling).

  • 3

    Fold the end of the webbing belt
    by ca. 1.5 cm and fix it onto the upper inner side of the side beam, using 5 staples. Remove the temporary staples and smoothen the fibers over. Repeat this process with the remaining three belts that run in the same direction.

  • 4

    Fix the loose end of the webbing belt underneath the lower beam of the backrest, using 5 staples. Roll the remaining loose end around the beam it is attached to and web it upwards, perpendicular to the already installed ones.

  • 5

    Tighten the loose end of the belt over the upper beam with a tensioning tool.

  • 6

    Fix it temporarily to the beam’s backside with a couple of staples. Cut the belt with 6 cm running from the upper back edge of the back beam (please check that this leaves you with sufficient material for stapling).

  • 7

    Fold the end of the webbing belt by ca. 1.5 cm and fix it to the bottom side of the beam, using 5 staples. Remove the temporary staples and smoothen the fibers over.

  • 8

    Repeat this process with the remaining five belts that run in the same direction.

  • Finished!